WordPress Gutenberg editor is quite powerful and intuitive to work once you get hang of it. Each paragraph, image, header, etc is a component of its own and is called a block. Like me, if you are a programmer you would appreciate how component simplifies complexity. By default Gutenberg editor comes with many different block types which would be sufficient for the normal blog posts. If you have specific needs then you can create your own custom blocks.
The default steps for creating a custom block is documented in the WordPress Block editor handbook and it is a cumbersome process as it involves a lot of file changes and coding. The simplest way of doing it is by using the Lazy Blocks plugin. It can be installed from add new plugin section of the WordPress admin area.
Creating a custom block with Lazy Blocks
Here I will explain how I created my Resources page which contains a huge list of bookmarks. Without a custom block, it would be very difficult to manage the growing list of links in plain HTML, therefore I have used Lazy Blocks to create a custom block called Card List, and below are the steps.
Once the Lazy Blocks plugin is installed and activated in the admin panel menu go to “Lazy Blocks > Add New” and it comes up with the following screen.
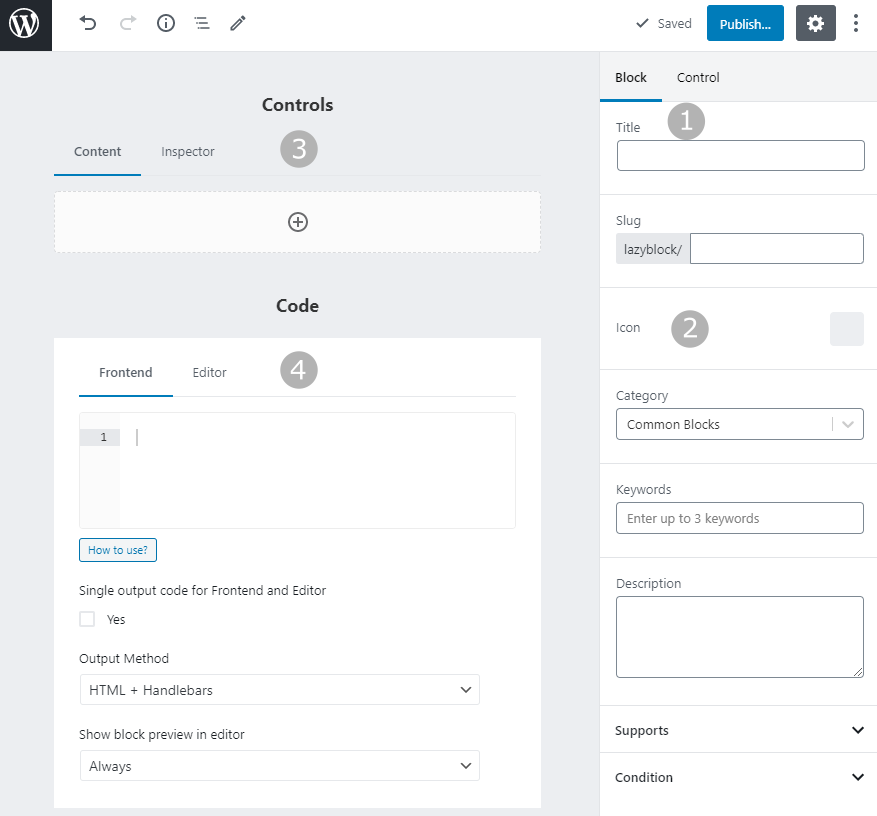
- On the right pan give a “Title” to the block and it will automatically generate the slug
- Select an Icon for your custom block, this icon will appear when you are adding the custom block in your post or page
- In the main area “Controls” section, you can add the fields to collect the data. Lazy blocks support a huge list of controls such as text boxes, drop-down, repeaters, etc. These controls can be added depending either on the selection tab
- Content: It adds the control to the main content area
- Inspector: It adds control to the right control pan for adding a configuration to the custom block
- In the “Code” section you can define the HTML content for the block output.
For styling, you could define within the code block, I prefer it to be in themes.
Below is my lazy block definition for “Card list”

Below is the HTML code for generating output, note that it uses handlebars templating for mapping the control fields, it is quite easy to learn with their documentation.
<div class="card-header">
<h2 class="card-header-title">{{title}}</h2>
<div class="card-header-description">{{{description}}}</div>
</div>
<div class="card-items">
{{#each items}}
<div class="card-item">
<h3 class="card-item-name">
{{#if url}}
<a href="{{url}}" target="_blank">{{name}}</a>
{{else}}
{{name}}
{{/if}}
</h3>
<div class="card-item-details">
{{{details}}}
</div>
</div>
{{/each}}
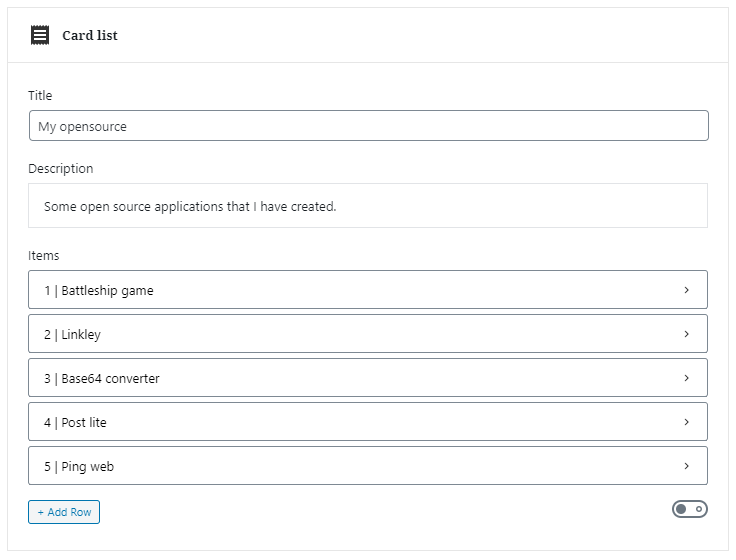
</div>After publishing the Lazy block new custom block, you can add it to your page and below is a snippet of my new block with some data.
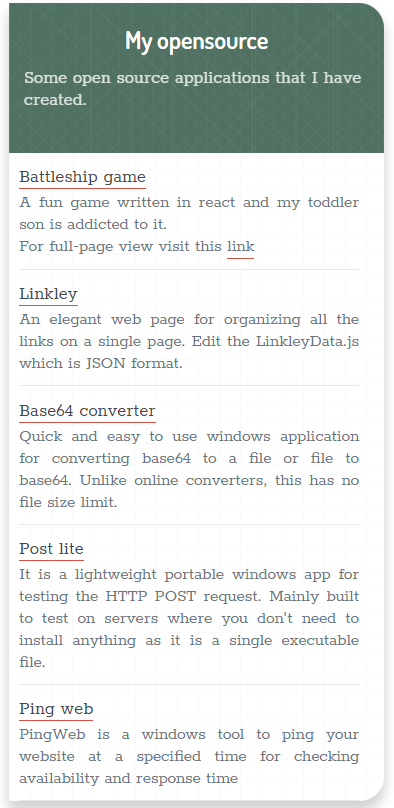
And the resulting output as below, the styling is defined in my theme.
Lazy blocks hugely simplifies the custom block creation and it quite handy in organizing the data.